The Studio
Video walkthrough
A quick overview
Cast's Studio was designed to make it hassle-free to record a podcast solo or with up to 3 guests. Each Studio session comes with a unique guest link that you can send to your guests which will allow them to join your session from their browser without installing any additional software.
Cast manages a live call between you and your guests, allows you to chat with your guests, mute yourself, and make private notes that only you can see. In the background, Cast streams a high-fidelity audio recording for each participant to the cloud, where we store it for mixing in the Editor or for download on your Account page.
Hit "Record" when your guests have joined and you're ready to roll.
From start to finish
When you first launch the Studio, as a host or a guest, you'll be prompted to select the microphone that you'd like to use to record. Cast will automatically select the previous microphone you've used if it's still present and plugged in to your computer. If you haven't purchased a microphone, it's possible that your computer includes one built-in (though it likely won't sound as great as a dedicated microphone). If you haven't plugged in your microphone yet, this is the time to do it – Cast will notice and add it to the list.
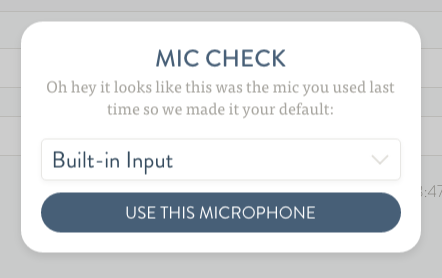
The Studio microphone prompt
This is also a good time to plug in a pair of headphones. Using headphones while recording your podcast will mean that the microphone picks up only your voice, which improves the quality of your final recording, and it will prevent your guest's audio from causing feedback or echoes while you're recording.
Before getting started, you might want to set a name for your session that will help you find it later. You can always rename your session from your Account page if you forget or want to change the name.
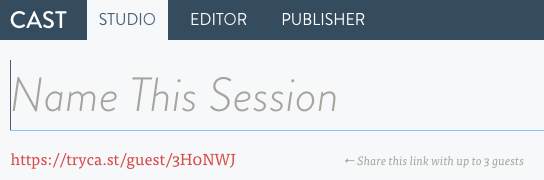
Set a name for your session, and share the link with your guests
If you're recording with one or more guests, now it's time to send them the guest link that you see under your session name. Each guest will be prompted to select their preferred microphone and enter their name, after which you'll all be connected together in an audio conference. Each participant will be able to see the other members of the conference, the title of the session and participate in a text chat.
Cast also includes a "raise your hand" feature, which lets you visibly signal to the other participants that you'd like their attention. Using the text chat and the "raise your hand" feature is great way to smoothly manage your conversation and handle things like turn-taking without interrupting your guests while they're talking.
Raising your hand
As the host, you'll have some additional controls in the Studio. You are responsible for starting the recording and stopping it when you're complete. While recording, you can hover over any guest's name at the right side of the screen and see how much audio their computer has uploaded and how much is yet to upload. Above the chat, you can also make show notes that are only visible to yourself. These notes (along with the chat) can be downloaded later from the Account page, and are helpfully included in Cast's Editor while you're editing your podcast. Show notes are a great way to organize the sections of your recording (and perhaps to make editing notes to yourself when a guest goes off a little too long on a tangent).
Once you've started recording, you'll see a visualization on your own name to the right of the window that shows you Cast accumulating your recording locally and then uploading it to the cloud once a small segment has been accumulated. Hovering your mouse cursor over this visualization gives you more detailed information about the process.
You'll also notice a mute button on your name that allows you to mute your microphone – muting your mic prevents other participants from hearing you, and prevents your audio from being recorded.
Once your recording session is complete, click "Stop Recording" and Cast will ask all participants to wait while it completes uploading their final audio data. When this upload is complete, Cast will let you know. Your Studio session is all done!

Cast lets you know when it's done uploading your audio
Recording Tips
Use headphones: If you aren't recording solo, headphones are a must – for you, and for all of your guests. Headphones prevent the audio from your guests from being picked up by your microphone, which can cause echoes, feedback, and make for a less professional sounding podcast.
Upgrade your microphone: While the microphones built into many computers are certainly serviceable, you'll hear a big difference even if you move up to a relatively inexpensive USB condenser microphone. The microphone built into your computer likely has an omnidirectional polar pattern, which means that it picks up sound equally from all directions – upgrading to a microphone with a cardioid polar pattern means the microphone will primarily pick up sounds that are right in front of it, giving you a recording that is more of your voice and less of everything else.
Find a quiet environment: Background noise, including a fridge, talking people, an air conditioner, or anything else is going to make your podcast harder to listen to and distract your listeners.
Scheduled sessions
Cast makes it easy to schedule a future recording session – below the Studio button on Cast's main page, you'll find a button to schedule an upcoming session:

Schedule an upcoming recording session
Click the Scheduled Sessions button and you'll be taken to your Scheduled Sessions page, where you can review existing scheduled sessions or schedule a new one.
When scheduling a session, you can name your session, pick a date and time, and choose which guests you'd like us to invite for you. We'll email everybody in the session a link to join 30 minutes ahead of your session time, and we can also send an immediate email informing your guests of the scheduled session. All emails will contain a permanent bookmarkable link to Cast's Greenroom for this session, which will let you and your guests test your recording equipment and internet connection in advance of the session
Once you've joined a scheduled session, everything else works just as you're used to in the Studio.
Frequently asked questions
I'm hearing high pitched noise or feedback while I'm recording with one or more guests. What gives?
Feedback often occurs when somebody in your podcast session is recording without headphones – their microphone picks up audio coming out of the speakers and sends it back through Cast, eventually resulting in a feedback loop. Plugging in a pair of headphones (even a cheap pair!) will sort this out, and it'll mean your recordings sound even better.
How many guests can I invite to a Studio session?
Currently Cast's Studio is limited to 4 people – you and three guests. We're considering whether it makes sense to raise this limit in the future, and if it's something you're looking for we'd love to hear about it; email us at support@tryca.st.
My guest's audio sounds compressed while we're talking. Will the recording sound like that?
Cast uses two separate streams from your microphone while you're recording in the studio – one goes into our voice-over-IP engine and gets sent to your other Studio participants, while the other goes straight into our high-fidelity audio encoder for upload to the Cast Cloud. The first stream may get compressed more or less as your browser attempts to find the best balance of quality that works for your internet connection, but the second stream is kept pristine, and this is what Cast records.
What happens if my internet disconnects / my computer self-destructs / some other disaster befalls me right as I'm recording a session?
We know that your sessions are of the utmost importance, so Cast streams your recorded audio to the cloud in near-realtime. At any given time during your recording session, most of your audio is already safe and sound in the cloud.
In the event of an unrecoverable internet connection interruption, Cast will end the call and try for some time to complete the upload of your remaining data. If the upload never completes, Cast will offer you your remaining audio for you to download – you can restore this data automatically in the Editor. Visit the Editor guide's Restoring Backups section to learn more.
Does Cast record an audio file for each guest?
Absolutely we do. Every guest gets their own pristine, high-fidelity, synchronized audio file.
Can I download my recorded audio if I want to store it or edit it outside of Cast?
Of course! Head on over to your account page, and you'll see an "Audio tracks" link under each recording session. This will download your recorded audio for that session.
Do my guests need a Cast account?
Nope! Only the host needs to have an account with Cast.
What happens if a guest joins after I've started recording, or somebody disconnects and rejoins?
Cast tracks the join-time of any late-joining guests, and we treat somebody disconnecting and rejoining as a new guest joining late. In both of these cases, the guest's audio will be properly offset when editing in Cast's Editor. If you choose to download your recorded audio files, Cast will process any late-join guests to pad their recordings with silence so they're easy to align in the audio editor of your choice.
Does recording with multiple guests use up more time against my Cast account?
No way – that'd be confusing. An hour recording uses up an hour of credit, whether you're recording solo or with guests.
What if I want to record a podcast with multiple people in the same room?
Here's what's worked for us. (The instructions below assume you have a different microphone plugged into your computer for each guest.)
- mute your computer's audio to avoid feedback
- start your Studio session and select your host's microphone
- open an Incognito window in Chrome (File → New Incognito Window) for each guest, and navigate each to your guest link
- in each Incognito window, select the appropriate microphone for each guest
This will result in a separate recorded track for each participant in your podcast, as if you had all recorded remotely with Cast.
Is Cast better quality than Google Hangouts or Skype?
We sure think so (but judge for yourself)! Tools like Skype and Hangouts are made for realtime voice/video conversations, and their audio quality is optimized for this. Cast's Studio includes a realtime audio component, which is of similar audio quality, but we also encode your voice (and the voice of each of your guests) separately, to a much higher-fidelity audio stream, and that's what makes up your recording.
How do I change my photo on Cast?
Cast uses Gravatar to load a photo that corresponds with your email address. If you don't have a Gravatar account, head on over to Gravatar and set one up for free (for whichever email address you use for your Cast account) and – like magic! – your photo will show up in Cast.
Chrome is warning me about my recording download / Chrome won't let me download my recordings.
Chrome warns users whenever a website downloads multiple files at once. Cast tries to space your downloads out slightly to avoid this warning, but occasionally it is triggered nonetheless. Clicking "Allow" on the warning will allow Cast to download your files and won't compromise your security.
If you've been shown this warning and dismissed it without clicking "Allow", Chrome will block all subsequent downloads. To unlock downloads from Cast's site, you'll want to open Chrome's settings and scroll down to the Privacy section and click Content Settings. In the Content Settings popup, scroll to Automatic Downloads and click Manage Exceptions. If there's already a reference to tryca.st in this list, you'll want to change it from Block to Allow.
If no reference exists, enter the following Hostname Pattern: https://[*.]tryca.st:443 and choose allow:
Allowing Cast to download your recordings
Cast tells me my internet connection is down?
During your recording session Cast needs to be in constant communication with our servers and the other participants in your podcast. If Cast is unable to establish or maintain this connection, you won't be able to record, and we'll warn you of this.
If you're struggling with an unreliable connection while on wifi, the first thing to try is to switch over to a wired ethernet connection to your router.
How do I avoid clipping? What is clipping?
Every microphone and recording setup will have a limit to the loudness of sounds that it can properly record. Sounds that exceed this volume are said to have clipped, and produce an unpleasant sound that you want to avoid in your recordings. While it's important to not be too quiet while recording in the Studio, it's better to err on the quiet side; it's easy to increase the volume of a recording after the fact, but clipping cannot be fixed in the same way.
Cast's Studio monitors your recording in real-time and will warn you when it looks like you are clipping (or you're coming close). If you've received a warning, your best bet is to move a little further away from your microphone, or to adjust your microphone to be a bit quieter (if your mic or audio interface supports this). If you're hosting a session, we'll also let you know if one of your guests appears to be clipping – and we'll let them know too.
Cast says my browser is reporting the wrong sample rate. How do I fix this?
Cast needs to know your microphone's sample rate so we can properly encode and save your audio data, but from time to time your browser will report an incorrect sample rate for your microphone. If Cast uses this incorrect sample rate, it can produce a damaged recording.
We have found that setting your desired recording microphone as your system's default microphone, and your desired output device as your default output device reduces the likelihood of this occurring.
On macOS: Open System Preferences, Sound, Input and select your recording microphone to make it default. Chooose Output and select your desired output device to make it default.
On Windows: Open Sound settings in Control Panel, and in the Recording tab, choose your recording microphone and click Set Default. In the Playback tab, set your desired output device and click Set Default.