The Editor
Video walkthrough
A quick overview
Cast's Editor was designed to make it quick and easy to mix a podcast you've recorded with Cast's Studio. When you initially open Cast's Editor, you'll see your recorded audio tracks, with a waveform visible for each user's recording. Cast aligns your audio for each guest (even late-joiners) so you don't have to waste time fiddling with your alignment.
Using the Editor's audio volume sliders and Cuts bar, you can adjust the relative volume of each guest and remove sections from your podcast that you don't want in your final mix. By dropping in MP3 files as layers or wedges, you can add additional elements to your podcast such as background music and ads.
When you've got your edited podcast, hit the Mix button, and a few moments later Cast's mixing server will have prepared your final, mixed audio for you.
From start to finish
When you start an Editor project you'll see a track for each guest in the podcast you're editing, as well as playback controls to listen to your current edits in the Editor.
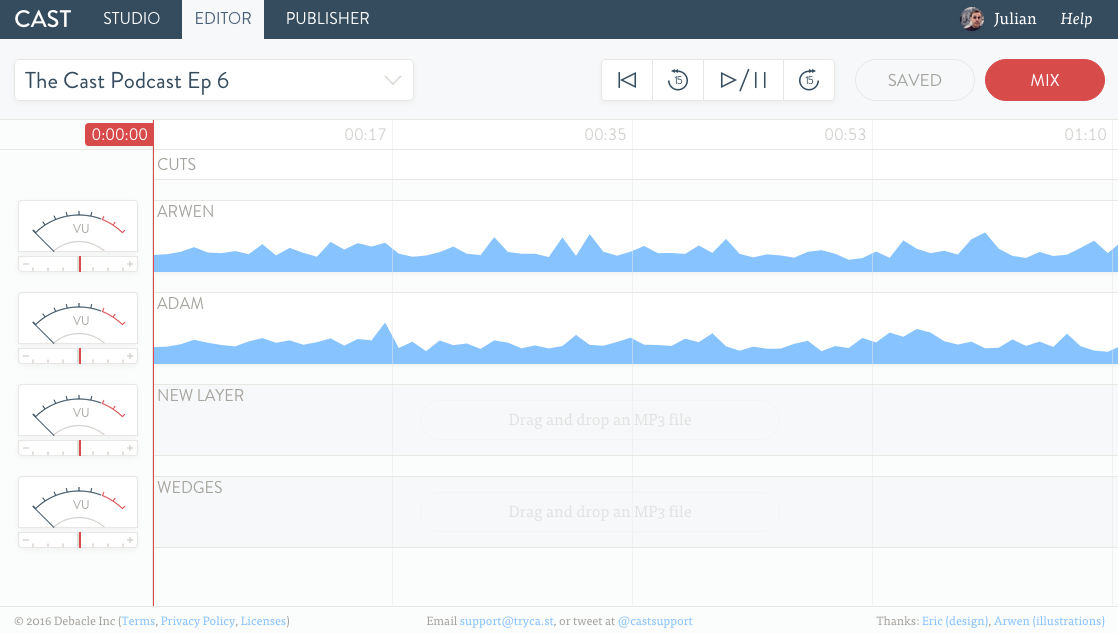
The Editor window
If you release your podcast as a raw record of your conversation, congratulations, you're all done. Hit the Mix button and your work is complete. If, like most people, you'd like to adjust your recording a bit, we'll continue.
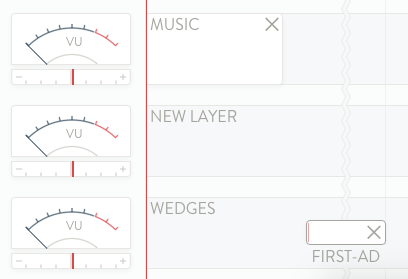
As you play back your audio, you'll notice a VU meter next to each track, as well as one for your wedges track and one for each layer you add to your project. This shows you the volume of each track as it plays back. Beneath the VU meter is a volume slider that lets you adjust the relative audio of your tracks. You may find, for example, that one guest is consistently quieter than everybody else and needs a volume boost, or your background music needs to be quieter.
A VU meter during playback
At the top of the Editor window, you'll see a control box, containing 4 control buttons. The leftmost control button moves the playhead in the editor back to the beginning of your recording. The second button from the left moves the playhead back by 15 seconds. The next control button starts your project playing if it's paused, and pauses it if you're currently playing back. (Tip: You can also play/pause your project with the spacebar key on your keyboard.) The rightmost control button skips your project forward by 15 seconds.
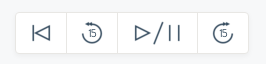
The Editor controls (left to right): back to start, back 15 seconds, play/pause, forward 15 seconds
If you have sections of your recording that you'd like to eliminate from your final mix, you'll want to insert a Cut, by clicking and dragging in the Cuts bar above your recordings. By resizing and positioning the cut, you can indicate exactly what you'd like to remove – and you can delete a cut at any time by clicking the X in the bottom centre of the cut itself. Of course, all of the edits you make to your project are completely reversible – cutting out audio doesn't permanently remove it from your project, and deleting the cut will restore the cut section immediately.
Inserting a Cut
Once you have inserted a Cut into your project, you can re-position it by dragging it by the handle at the top. Handles at the left and right edges allow you to resize your cut.
Adjusting a Cut
If you'd like to adjust your Cut to be even smaller, you can double-click on it and manually enter your cut duration. You can also use the custom duration modal to set your Cut's duration with more precision than the draggable handles.
Similar to the Editor's Cuts feature, Cast's Editor also supports Track Cuts. Track Cuts are inserted by clicking and dragging in a specific track, and can be similarly repositioned or resized. Unlike a traditional Cut, a Track Cut will cause Cast's mixer to mute the cut section, which allows you to mute a specific section of a track's audio without removing the entire region from your podcast. This is particularly useful when one guest has a coughing fit and forgets to mute their microphone. Just like a regular Cut, you can double-click on a Track Cut to manually enter a custom duration.
Inserting & positioning a Track Cut
Many podcasts include background music (perhaps during the introduction) and some include interstitial ads, which interrupt the podcast at various points to play. Cast includes features that make it very easy to add both types of audio to your podcast. If you'd like the additional audio to play back alongside your Studio recording, we call that a Layer, and you can add one to your podcast by dragging and dropping an MP3 file on the "New Layer" track in the Editor, or by double-clicking on the layer track. Once your layer has uploaded, you'll see a draggable layer object in your Editor window. Drag the object to position it where you'd like it to play back, or click the X at the top-right of the layer box to remove it altogether.
If you'd like to add an audio file that interrupts playback (an interstitial ad, for example), we call that a Wedge, and similar to layers you can insert a wedge by dragging and dropping an MP3 file on the "Wedges" track in the Editor, or by double-clicking on the Wedge track. You'll see a vertical line that runs through your entire project to indicate precisely where a wedge is positioned.
Much like layers, wedges can be dragged to position them within your project, and can be removed when they're not needed. Remember that wedges play one at a time and will pause all other playback (including layers) while they play. Wedges placed inside a cut will play back in place of the removed audio.
Layers and Wedges
If you would like you create a short recording for insertion as a wedge into your session, Cast's Editor supports this through the punch-in feature. Clicking the punch-in button in the Editor will start the punch-in process, which will let you record up to two minutes for insertion as a wedge anywhere in your recording. Punch-ins are great to record intros or outtros after the fact, and they mean you don't have to leave the Editor to make these brief recordings. Punch-ins also support recording your voice on top of background music.
For more on when you might want to use a punch-in, and how to use them, check out our reference article Adding to a Recording After the Fact.
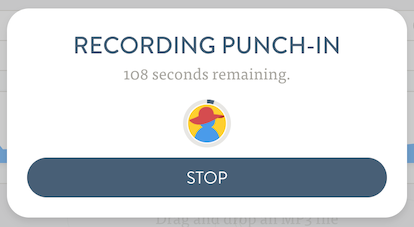
Recording a punch-in in the Editor
Once you've got your podcast just right, it's time to mix it down to a single file so you can share it with the world. Click the Mix button at the top-right of the Editor window and enter a mix name if you'd like.
Select dynamic compression if you'd like Cast's mixer to apply some compression to normalize the volume level across your project. (You can read more about dynamic compression in Cast's Dynamic Compression Reference Document.) Click "Per-track mixing settings" if you'd like to enable noise reduction on any of your recording tracks.
Cast's mixer is very fast, but larger projects may take a few minutes to mix – you're safe to close the Editor window while the mix is underway. You can ask Cast to notify you when the mix completes, and you can always visit your Account page if you'd like to download the mix of a project.
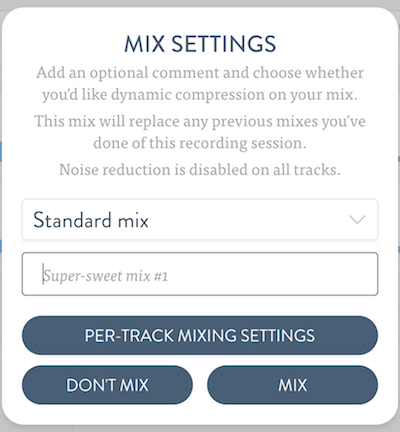
The Editor's mix window
Restoring Backups
We know that your sessions are of the utmost importance, so Cast streams your recorded audio to the cloud in near-realtime. At any given time during your recording session, most of your audio is already safe and sound in the cloud.
In the event of an unrecoverable internet connection interruption, Cast will end the call and try for some time to complete the upload of your remaining data. You'll also be prompted to download a local copy of the data that has not yet been uploaded — this will be downloaded as a castbackup file.
If Cast your computer remains unable to upload this remaining data and you're forced to abandon the Studio session, Cast's Editor can help you restore your backup and reintegrate it into your session. Simply open the session in question and drag and drop the castbackup file onto the session's Wedge or Layers bar — just like you would if you were adding a Wedge or Layer to a session. Cast's Editor will recognize that this is a backup restoration, and it will do all the work necessary to upload your backup and reintegrate it into your session. Sit tight while that completes and you'll be all set.
If a backup file is generated for a guest in your session, you simply need to have them send you the castbackup file, and restore it in the Editor as usual.
Frequently Asked Questions
What does the 'dynamic compression' mix option do?
Dynamic compression acts to reduce the volume of louder parts of your mix and increase quieter parts, resulting in a more even volume level throughout the recording. If you notice guests getting louder and quieter throughout the recording (which can be caused by moving closer and further from the microphone as you record), dynamic compression might help with this. Of course, if one guest is consistently quieter than everybody else, you can use the Editor's volume level for that guest track to boost their volume so that it's more in line with your other guests.
Do I have to use Cast's Editor? What if I prefer something else?
We've done our best to make Cast's Editor powerful and easy to use, but of course we understand that you might perfer to edit your recordings outside of Cast, and we make that easy to do. Once you've finished recording a session in the Studio, navigate to your Account page and you'll see an "Audio Tracks" link listed under your session. Clicking this link will download your recorded audio files – one track each for your guests. Cast prepares your files for download the first time you click this link for a session, so your first download may take a few minutes to prepare if you have a large recording with many guests.
If you've got a recording made outside of Cast and you want to import your final mix as a new episode we support that too.
How do I remove a section from my recording?
At the top of your Editor window, below the timeline bar, you'll see a Cuts bar. Clicking and dragging in this bar will insert a Cut into your project. Cuts are sections of audio that you would like to be cut out of your final mix – the Editor will skip over cut sections when playing your audio back, and Cast's mixer will remove these sections when it mixes your project. Cuts can be repositioned using the handle at their top, and resized with the handles on either side. If you'd like to set a custom duration for your Cut, double-click anywhere on it and you'll be prompted to enter a duration.
Can I just mute one specific track for a period of time?
Indeed you can! Instead of dragging on the Cuts bar to insert a Cut, drag on the track you'd like to mute to insert a Track Cut. This will mute that track for the duration of the Track Cut, but other tracks will play normally. As with regular Cuts, you can drag Track Cuts to reposition them, resize them, and even double-click them to set a custom duration.
What is the difference between a wedge and a layer?
While layers play on top of your podcast project, a wedge pauses playback of all other audio while it plays. We envisioned layers for things like background music – things you want to playback alongside your conversation, whereas wedges are great for dropping in interstitial ads that need to interrupt the podcast, play, then resume the podcast.
Why doesn't Cast's mixer complete mixing immediately?
Mixing audio files is a computationally-intensive process, and audio editing software like Logic or GarageBand also take time to export a project's final mix. Fortunately, Cast's mixer runs in the cloud where we can make use of extremely powerful servers – much more powerful than the average user's computer – to mix your audio more quickly than it would if it were mixing on your own computer. And if you don't feel like waiting around for the mixer to complete, you can click a button to request that Cast email you when your mix has completed. In all cases, you can close the Editor window once your mix has begun and the mixing process will proceed regardless.
Can I come back and download my mix later?
Of course – visit your Account page and you'll find a "Final Mix" link listed under any podcast that you've mixed. This link will download your mix.
Can I use Cast's Editor to edit a podcast that I've recorded elsewhere?
Currently our Editor only supports editing podcasts that were recorded with Cast, but we are considering expanding support to editing and mixing content not recorded with Cast in the future. If this is something you'd like to see us support, email us at support@tryca.st and let us know that it's important to you.
What type of audio files can I use as layers and wedges?
Cast supports MP3 files for layers and wedges.
Why is Cast warning my about my audio playback in the Editor? How can I fix this?
Cast's Editor monitors the quality of your audio playback to make sure what you're hearing is what you should be hearing.
In some cases (particularly with a number of microphones and output devices connected to your computer), your browser might get confused and play back audio using an incorrect sample rate, which can lead to poor audio quality, or garbled audio playback. If Cast detects this, we'll pop up a warning and let you know.
If you've received this warning, your best bet is to close the Editor, close your browser and restart your editing session.
My recording has a hum/hiss/buzzing sound in it. Is there anything I can do to fix this?
Yes! While it's important to try to eliminate all sources of background noise in advance of recording, sometimes that isn't possible. In recordings that have constant background noise such as a hiss, hum or buzz, Cast's noise reduction feature may be able to help reduce the noise.